Previously on winterglass, we learn how to setup and run an empty flixel project. If it works, congrats! If it doesn't it's time to call for help... :D cause I am moving forward to the next tutorial.
What we are going to do here is to :
- Import a bitmap into the game
- Add the imported bitmap as a sprite to the game
-Eat with your nose!
Since we are not working in the Adobe Flash Pro interface we do not have the tools to drawlavishly beautiful vector sprites. We are left with the option of importing Starcraft SUV sprites from the mpg files from external file.
Importing bitmap in Flixel does not restrict you to bitmap as in bmp files but you get the variety of png, jpg and bmp to choose from each with their own unique advantages. I will be dealing with png since it's cleanunlike jpegs lossy compression and has transparency :D
Yes, transparency information in png. We will need to draw a 'ClownShip' with external drawing packages like GIMP, Photoshop, CorelDraw...MS Paint.
Here is my ClownShip below!

I call it clownship.png. Cool right? I mean if you compare with the old vector ClownShip from my previous tutorials. This is a side view instead of the old top down view. You got it right, I am gonna make a left right scrolling shooter instead of the old top down. Enough about directions, since I am writing this tutorial I minus well do it nicely with a good game to end up with in the end.
You might consider buying a Wacom tablet if you are into drawings. It makes drawing sprites ....... easier.
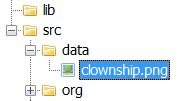
The sprites we are importing is a 64 x 32 pixel sprite. The filename I choosed is clownship.png located at 'data' directory. Yes I created a directory called 'data' inside of 'src'
Now we are going to create a class for the clownship. Why? because creating classes for stuffs makes it easier to control / manage once the project gets big. You will need classes for the player, the enemy...
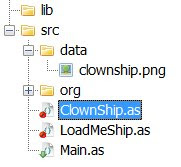
Under 'src', right click and Add->New Class. Call the new class 'ClownShip'. You will get a ClownShip.as file created for you in the 'src' directory.
Your directory should now look like this.
Now open up the file in the editor. Again you are not interested in the default items in the file. Replace them with these.
Lets go line by line again. In the previous episode, we started with classes that extends FlxGame then goes into FlxState. It simply means... We create a game base and put in a stage to the game. All game needs a stage even if it's just a title screen, a game level 1, 2, 3...
Now we need to put in a player or sprite so we extends the FlxSprite thus the public class ClownShip extends FlxSprite
[Embed(source = "data/clownship.png")] private var ImgShip:Class;
- This is the way to tell it to import a bitmap picture called clownship.png in the 'data' subdirectory and refer to it as ImgShip.
loadGraphic(ImgShip);
- Ok loadGraphic is a function inherited from the FlxSprite class. Just go ahead and open the FlxSprite.as from the 'src/org/flixel/FlxSprite.as' directory and search for loadGraphic
- Since it's in the constructor function of ClownShip, it simple loads the bitmap whenever it's created / instantiated.
- The are other parameters which can be passed into the loadGraphic function. I will go that later but if you are interested you can just view the doc that comes with flixel.
Ok now that you have created the ClownShip class, try hitting 'F5'... waaa laaaa.. nothing happens. Why? Because you didn't add it in the stage / state. Go back to LoadMeShip.as
Declare the ClownShip and add it in the state! The code should look like this.
private var cShip:ClownShip;
- You declare a ClownShip and call it cShip. You kinda need to grasp the concept here.
- You are telling it that there is a thing called cShip which is a (type) ClownShip.
cShip = new ClownShip();
- You are instantiating / creating the cShip as a new ClownShip. Basically you can create / instantiate lots of ClownShips with a different name but make sure you declare them first. This one so happends to be named cShip.Am I making sense? I am sounding weird here...
add(cShip);
- Now you are adding the cShip, which is a type ClownShip to the playing stage! By default it's located top left ( x = 0, y = 0 )
- What, where did 'add' come from? Take a guess.... yes it's from the FlxState class. To see what it does, just go to the doc under FlxState class and read on.. it tells you it needs an FlxObject to be passed in. FlxObject? Well now take a look at FlxSprite doc file. You see it says it inherits from FlxObject so making it a FlxObject... confuse?... you need to look into these docs often to get up and running on these libraries.
//trace('I am running');
- The // means I commented out this line of code. I think you all knew this already... I just needed this article to be a bit longer.
Now hit 'F5' again. ta daaa.... you have the ship up at the top and it's ready to move around. Now hit the arrow keys. Yes.... yes..... it's not moving.
You will have to wait for the next episode for that to happen! So stay tuned...
What we are going to do here is to :
- Import a bitmap into the game
- Add the imported bitmap as a sprite to the game
-
Since we are not working in the Adobe Flash Pro interface we do not have the tools to draw
Importing bitmap in Flixel does not restrict you to bitmap as in bmp files but you get the variety of png, jpg and bmp to choose from each with their own unique advantages. I will be dealing with png since it's clean
Yes, transparency information in png. We will need to draw a 'ClownShip' with external drawing packages like GIMP, Photoshop, CorelDraw...
Here is my ClownShip below!

I call it clownship.png. Cool right? I mean if you compare with the old vector ClownShip from my previous tutorials. This is a side view instead of the old top down view. You got it right, I am gonna make a left right scrolling shooter instead of the old top down. Enough about directions, since I am writing this tutorial I minus well do it nicely with a good game to end up with in the end.
You might consider buying a Wacom tablet if you are into drawings. It makes drawing sprites ....... easier.
The sprites we are importing is a 64 x 32 pixel sprite. The filename I choosed is clownship.png located at 'data' directory. Yes I created a directory called 'data' inside of 'src'
Now we are going to create a class for the clownship. Why? because creating classes for stuffs makes it easier to control / manage once the project gets big. You will need classes for the player, the enemy...
Under 'src', right click and Add->New Class. Call the new class 'ClownShip'. You will get a ClownShip.as file created for you in the 'src' directory.
Your directory should now look like this.
Now open up the file in the editor. Again you are not interested in the default items in the file. Replace them with these.
package

{

import org.flixel.*;


 public class ClownShip extends FlxSprite

 {

  [Embed(source = "data/clownship.png")] private var ImgShip:Class;

  public function ClownShip()

  {

   loadGraphic(ImgShip);

  }

 }


}
Lets go line by line again. In the previous episode, we started with classes that extends FlxGame then goes into FlxState. It simply means... We create a game base and put in a stage to the game. All game needs a stage even if it's just a title screen, a game level 1, 2, 3...
Now we need to put in a player or sprite so we extends the FlxSprite thus the public class ClownShip extends FlxSprite
[Embed(source = "data/clownship.png")] private var ImgShip:Class;
- This is the way to tell it to import a bitmap picture called clownship.png in the 'data' subdirectory and refer to it as ImgShip.
loadGraphic(ImgShip);
- Ok loadGraphic is a function inherited from the FlxSprite class. Just go ahead and open the FlxSprite.as from the 'src/org/flixel/FlxSprite.as' directory and search for loadGraphic
- Since it's in the constructor function of ClownShip, it simple loads the bitmap whenever it's created / instantiated.
- The are other parameters which can be passed into the loadGraphic function. I will go that later but if you are interested you can just view the doc that comes with flixel.
Ok now that you have created the ClownShip class, try hitting 'F5'... waaa laaaa.. nothing happens. Why? Because you didn't add it in the stage / state. Go back to LoadMeShip.as
Declare the ClownShip and add it in the state! The code should look like this.
package

{

 import org.flixel.FlxState;


 public class LoadMeShip extends FlxState

 {

  private var cShip:ClownShip;


  public function LoadMeShip():void

  {

   cShip = new ClownShip();

   add(cShip);

   //trace('I am running');

  }

 }

}
private var cShip:ClownShip;
- You declare a ClownShip and call it cShip. You kinda need to grasp the concept here.
- You are telling it that there is a thing called cShip which is a (type) ClownShip.
cShip = new ClownShip();
- You are instantiating / creating the cShip as a new ClownShip. Basically you can create / instantiate lots of ClownShips with a different name but make sure you declare them first. This one so happends to be named cShip.
add(cShip);
- Now you are adding the cShip, which is a type ClownShip to the playing stage! By default it's located top left ( x = 0, y = 0 )
- What, where did 'add' come from? Take a guess.... yes it's from the FlxState class. To see what it does, just go to the doc under FlxState class and read on.. it tells you it needs an FlxObject to be passed in. FlxObject? Well now take a look at FlxSprite doc file. You see it says it inherits from FlxObject so making it a FlxObject... confuse?... you need to look into these docs often to get up and running on these libraries.
//trace('I am running');
- The // means I commented out this line of code. I think you all knew this already... I just needed this article to be a bit longer.
Now hit 'F5' again. ta daaa.... you have the ship up at the top and it's ready to move around. Now hit the arrow keys. Yes.... yes..... it's not moving.
You will have to wait for the next episode for that to happen! So stay tuned...
1 comment:
Sadly, I have to say that with all of the tutorials I have come across, yours have been by far the EASIEST to get a handle on! I have never gotten Flixel to work before....thanks!
Post a Comment